Hey folks, if you’re reading this, chances are you’ve got a spot welding machine that’s being a total pain in the neck—either it’s not making a weld at all, spitting out wonky ones, or maybe it’s throwing random error codes that make zero sense. As a spot welding machine supplier, I talk to shop owners, fabricators, and maintenance techs every single week who’re stuck in the same boat. I’ve seen everything from a machine that stopped mid-production (costing someone a whole shift of work) to one that was “broken” because someone didn’t plug it in all the way. Today I’m walking you through the step-by-step troubleshooting process I actually share with my customers—no stuffy textbook jargon, just real, actionable stuff that works. Let’s dive in. Spot Welding Machine
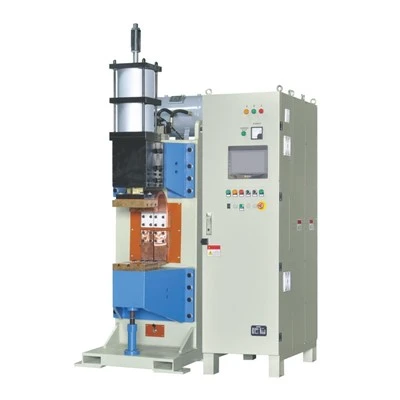
First off, before you even touch a single part of the machine, hit the big red E-stop button. I can’t tell you how many times I’ve gotten a panicked call at 7AM from a customer saying their machine’s “dead,” only to find out they smacked the E-stop when they grabbed a part last shift. That’s rule number one: never skip checking that E-stop. If it’s popped out, twist it clockwise until it clicks, then turn the machine on like normal. If it’s already out, move on to the next basic check: power supply. I know, I know—power seems like a no-brainer, but I’ve had customers plug a 220V spot welder into a regular 110V outlet, and wonder why it can’t even fire up. Check the circuit breaker on the wall (the one that feeds the machine) first—tripped breakers are super common in busy shops where multiple things are running off the same circuit. If that’s fine, check the machine’s internal fuse. Most welders have a little panel on the back or side that lets you pop out the fuse to see if it’s blown. If it is, don’t just pop in a bigger one to fix it—use the exact same amp rating. Cranking up the fuse will only cause more damage later, trust me. If the power’s good and E-stop is disengaged, now we can move to the actual welding function.
Let’s say your machine turns on, but it won’t make a weld at all. Next step: check the electrode tips. Electrode wear is like the #1 issue I see with spot welders, hands down. Those little copper tips that press down on the metal workpieces get pitted, corroded, or flattened after a bunch of uses, and that kills the current transfer. Take a look at them—if you see cracks, dents, or a surface that looks all bumpy or crusted over with spatter, that’s your problem. What to do about it? You can either dress them with an electrode dresser (or even a flat file in a pinch, though a dresser is way better) to get a smooth, round tip again, or replace them if they’re too far gone. Pro tip from our team: dress your electrodes at the start of every shift, and after every 50 welds, if you’re running a lot of metal like steel or aluminum. That little 2-minute checkup saves you way more time fixing bad welds later.
If the electrodes look good, let’s move to pressure. Spot welders need the right amount of force between the two electrodes to make a good weld. Too little pressure, and the current can’t flow through the metal properly—you’ll get a cold weld that just breaks apart when you tap it. Too much pressure, and you’ll squish the metal, or even damage the machine’s pneumatic (or mechanical) pressure system. How do you check that? If you’ve got a pneumatic spot welder, there’s a pressure gauge on the air line leading to the machine. Most of these run best at 60-90 PSI, depending on the model—check your machine’s manual (or our team’s quick cheat sheet for common models) for the exact number. If it’s too low, crank up the air pressure slowly, test a scrap piece of metal, and keep adjusting until you get a good weld. If it’s already at the right pressure, maybe the pressure regulator is stuck, or the air line has a leak. A quick way to check for leaks: spray soapy water on the air line when it’s pressurized—if you see bubbles, you’ve got a leak that needs fixing.
Now, if your machine is firing, but the welds are inconsistent—some are strong, some are weak, some skip spots—this is usually a current issue. Let’s break that down. First, check the welding current setting. A lot of newer welders have a digital display for current, but if yours is an older analog model, it might have a dial that’s easy to nudge by accident when you’re moving things around. Make sure the current is set to the right level for your metal thickness. For example, thin gauge steel (16 gauge or thinner) needs lower current, like 20-40 kA, while thicker stuff (10 gauge or ¼ inch) might need 60-80 kA. If the setting is off, that’ll cause weak or inconsistent welds. Also, check the welding time—if you’re running the current for too short a time, the metal won’t heat up enough to fuse, and too long will burn through the metal. Most good welders have a timer that lets you adjust this—for thin metal, 0.1 to 0.5 seconds is usually enough, while thicker metal might need 1 to 2 seconds. Tweak this in small increments, test on scrap each time, until you get consistent results.
Another common culprit for inconsistent welds: loose connections. Over time, the wires that carry current to the electrodes can get loose from vibration during operation, or from being bumped when you’re loading metal. Grab a wrench (or the right tool for your machine’s connection points) and check all the wire terminals—at the electrode holders, at the power supply panel, and at the control unit. Even a tiny loose connection can cause a big drop in current, leading to weak welds. Don’t over-tighten them, though—you can strip the threads or break the wire if you crank too hard. Just make sure they’re snug, and no wires are hanging loose.
What if your welds are spitting, or have spatter all over them? Spatter happens when the metal gets overheated, usually because of too much current or too long welding time. But sometimes it’s also because the metal you’re welding has leftover oil, grease, or rust on it. Before welding any piece of metal, even if it looks clean, wipe it down with a degreaser or a rag with some rubbing alcohol to get rid of any contaminants. Even a tiny bit of oil on the metal will burn when the current hits it, causing spatter. Also, make sure your electrodes are dressed—rough electrodes can catch metal bits and cause spatter too. If you’re still getting spatter after fixing those, dial back the current or reduce the welding time by 5-10%, test on scrap, and go from there. If you’ve got a pneumatic welder, too much air pressure can also cause spatter, since it’ll push the molten metal out from between the electrodes.
Now, what if you’re getting an error code on your digital welder? Most modern welders have a built-in diagnostics system, which is super helpful if you know what the codes mean. I always tell my customers to keep a copy of their machine’s manual handy—error codes are listed right there, so you don’t have to guess. For example, a code like “E01” might mean overheating, “E02” could be a pressure issue, and “E03” might be a current sensor fault. If you don’t have the manual, our support team is always here to look up the code for you—no hoops to jump through, just send us a quick message. If the machine is overheating (that’s a common “generic” error code when it’s getting too hot), turn it off and let it cool down for at least 15 minutes. Make sure the vents on the machine aren’t blocked by scrap metal, rags, or dust—dust buildup inside the machine can block airflow and cause overheating over time. If it keeps overheating, you might need to clean the internal cooling fan, or check if the fan is working at all. A bad fan means no airflow, so the machine will overheat every time you run it for more than a few welds.
Wait, I should also mention the workpiece itself. A lot of people blame the machine when it’s just their metal that’s the problem. You can’t weld dissimilar metals super easily with a standard spot welder—like aluminum and steel, or copper and brass—without special settings or equipment. If you’re getting bad welds on dissimilar metals, that’s probably the issue. Also, if you’re welding metal that’s very thin, make sure you’re using the right electrode force and current—too much current on thin metal will burn through it, every time. Always test your settings on scrap pieces of the exact same metal and thickness you’re going to weld, before you run production pieces. That’s a habit that saves so much rework, I can’t stress that enough.
Let me also talk about routine maintenance, because a lot of troubleshooting can be avoided with simple regular checks. I know you’re busy, but spending 10 minutes at the end of each shift to do these things will save you hours of headaches later. Dress the electrode tips, wipe down the machine to remove spatter and dust, check all connections to make sure they’re tight, and inspect air lines (if pneumatic) for leaks or damage. Every 1000 welds (or every month, whichever comes first), replace the electrode tips, and check the internal parts for wear—like the pressure seals, or the welding cables. Our team sells genuine replacement parts, but I always tell customers to order spares so they don’t have to wait for parts if something breaks.
Now, what if you’ve gone through all these steps and your machine is still acting up? Don’t just keep guessing—reach out. As a spot welding machine supplier, we don’t just sell machines and disappear. We have a team of techs who’ve fixed every single issue you can think of, from a broken control board to a faulty transformer. We can walk you through more advanced checks, like testing the current transformer or checking the control circuit, over the phone or video call, so you don’t have to take the machine apart and risk making it worse. We also have genuine parts on hand, so if something needs replacing, we can get it to you fast, no long wait times.
I know troubleshooting a spot welder can feel overwhelming when you’re in the middle of a tight production deadline, but taking it step by step usually solves 90% of the issues. The key is to start with the simplest, most obvious checks (E-stop, power, electrodes) before moving to more complex stuff. Don’t skip the test welds on scrap—they’re your safety net to make sure you’re fixing the right problem.
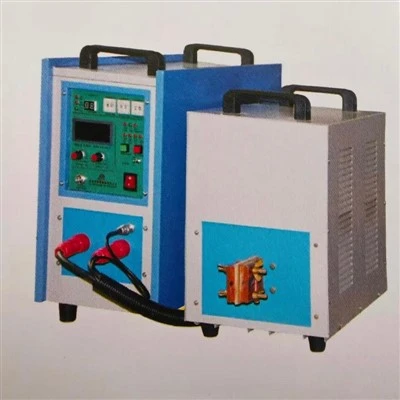
If you’re tired of troubleshooting a finicky spot welder, or you need a reliable machine that’s easy to maintain (and backed by a team that actually answers the phone when you have a problem), feel free to reach out to our team to chat about your needs. Whether you’re a small fab shop with 5 welds a day, or a big production facility running 24/7, we can help you find the right machine, and even train your team on basic troubleshooting so you can fix small issues without waiting for external help.
Induction Heating Machine References
- American Welding Society. (2020). Spot Welding: Principles and Practice (3rd ed.). AWS Press.
- Russell, J. (2022). Maintenance and Troubleshooting of Resistance Welding Equipment. Industrial Press.
- OSHA. (2021). Safety Guidelines for Resistance Welding Machines. U.S. Department of Labor.
Dongguan Huineng Welding Equipment Co., Ltd.
We are one of the most experienced spot welding machine manufacturers and suppliers in China. With a professional production team, we offer a wide range of products with superior quality. Please feel free to buy customized spot welding machine at competitive price from our factory.
Address: 530 Guantai Road, Xitou Village, Houjie Town, Dongguan City, Guangdong Province
E-mail: fengshanggang75@126.com
WebSite: https://www.huinengwelder.com/
