Hey there, if you’re reading this, chances are you’ve been eyeing that mini split AC unit for your home or small space but have been stressing about the install. Full transparency—we’re an AC supplier, and we get it. Mini splits look intimidating at first, but trust me, it’s way more doable than you think, even if you’re not a licensed HVAC tech. We’ve helped hundreds of customers (from DIY homeowners to small business owners) nail their installs, and today I’m breaking it down step by step, no fancy jargon, just real talk. Let’s dive in. Air Conditioner

First off, quick reality check: I’m not gonna lie to you—this isn’t a “15-minute DIY” job, but it’s not rocket science either. The key here is taking it slow, double-checking every step, and making sure you follow all the safety stuff (no cutting corners here, okay?). Also, before you even grab a drill, you’ve gotta do your pre-install homework. That’s where most people mess up, so don’t skip this part.
First step: Pick the right spot for both the indoor and outdoor units. Let’s start with the indoor unit. It needs to be high up—like 7 feet from the floor minimum, but not so high that you can’t reach the drain line later. It also shouldn’t be near any heat sources (hello, don’t put it above a window AC or a kitchen stove, that’ll make it work way harder than it needs to). And it has to be level—super important, because if it’s tilted the wrong way, the drain line won’t empty properly, and you’ll end up with water leaks. For the outdoor unit, it needs to be in a spot that’s well-ventilated, no blocked grills (keep it at least 12 inches away from walls, bushes, or anything else that might block air flow). Also, make sure it’s on level ground too—maybe a concrete pad or a sturdy metal bracket, so it doesn’t shift when the wind picks up. Oh, and never put it in direct sunlight if you can avoid it—like, under a eave is perfect, because that’ll keep it from working overtime. Pro tip from our team: measure the distance between the indoor and outdoor units first. The lineset (the tube that carries refrigerant between them) can only be so long—usually 25 to 50 feet, depending on the model. If you need longer lines, that’s something you might want to chat with a tech about, because adding extra lines can affect performance.
Next up, gather your tools and supplies. You can’t show up to a job with a half-empty toolbox, right? Let’s list the essentials: a drill (with masonry bits if you’re drilling into siding or concrete), a level (I prefer a digital one, way more accurate than the old bubble kind), a pipe cutter for the lineset (don’t use a hacksaw—you’ll mess up the copper), a vacuum pump (you need this to pull air out of the lines, so your AC works efficiently), a wrench set (for tightening fittings), a tape measure, a screwdriver set, and of course, the mini split unit itself (indoor, outdoor, lineset, wiring—make sure your supplier sends all the parts, we always include a quick checklist with every order so you don’t miss anything). Safety gear is non-negotiable too: work gloves, safety glasses, and if you’re on a ladder, a spotter. No exceptions.
Okay, now we get to the actual install. Let’s start with the indoor unit. First, mark where the mount goes on the wall. Use your level to make a perfect outline—you don’t want that thing lopsided. Drill the mounting bracket into the wall, make sure it’s super secure (if it’s a exterior wall, use wall anchors if needed, if it’s interior, stud finders are your friend—we tell all our customers to grab a $15 stud finder, worth every penny). Next, drill the hole for the lineset and wiring. This hole needs to slope slightly downward toward the outside—like a 1/4 inch per foot, so the drain water can flow out on its own. If you’re drilling through a brick or concrete wall, take your time, don’t rush, and wear a mask because concrete dust is no joke. Once the hole’s drilled, fish the lineset, drain line, and power wire through the hole from the inside out, so they stick out the wall a bit. Don’t pull too hard—you don’t wanna kink the lineset (kinks = bad, kills refrigerant flow).
Now the outdoor unit. Put it on its pad or bracket, level it (use your level on both the top and the sides—adjust the feet if it’s not straight, most units have adjustable feet for exactly this). Once it’s level, bolt it down so it doesn’t move. Next, connect the lineset to the outdoor unit. This part needs to be tight, but don’t over-tighten—you’ll strip the fitting, and that’s a headache. Each mini split model has specific torque specs, so check your manual—we include a printed manual with every unit, no confusing PDFs here, promise. Also, make sure you connect the right lines: the big one is the suction line (it’s insulated) and the small one is the liquid line. Mixing them up? Your AC won’t cool, so double-check.
Once the lines are connected to the outdoor unit, go back inside and connect them to the indoor unit. Same thing here—torque to spec, don’t overdo it. Then, run the drain line from the indoor unit through the hole to the outside. The drain line should be at a slight downward slope, no traps or bends that might clog it. You can add a small drain pan if you’re worried about leaks, but most units come with a built-in pan. Now, the power wiring. This is where you have to be extra careful—turn off the power at the breaker before you touch any wires, okay? Connect the power wire to the terminals on both the indoor and outdoor units, matching the colors (black to black, white to white, green to ground). Tuck all the wires away so they’re not hanging loose, that’s a tripping hazard.
Wait, we’re not done yet—super important step: evacuate the lineset. This is where the vacuum pump comes in. You attach the pump to the service valves on the outdoor unit, turn it on, and pull a vacuum for at least 30 minutes (some models need longer, check your manual). This removes all the moisture and air from the lines, because if there’s air in there, it’ll cause freezing and make your AC blow warm air. Trust me, we’ve had customers skip this step and call us panicking 2 days later—don’t be that person. After you’re done evacuating, close the valves, turn off the pump, and disconnect the lines. Don’t open the valves yet—wait, we’ll get to that.
Now, test the system. First, turn the power back on at the breaker. Then, open the service valves on the outdoor unit (slowly, don’t yank them open—you don’t wanna cause a refrigerant leak). Next, turn on the indoor unit with the remote. Wait 5 minutes, then check both the indoor and outdoor units. Is the indoor unit blowing cold air? Is the outdoor unit running and not making weird noises? Check the drain line outside—wait a little, you should see water flowing out, that means the drain is working. If you don’t see water, or if the air is warm, something’s wrong. Don’t panic—most issues are small, like a loose wire or a valve not all the way open. If you run into a problem, our support team’s here, even after you buy. We don’t just sell units, we help you install ’em.
Wait, a few quick do’s and don’ts I wish someone told me before my first mini split install. Do use insulated lineset—uninsulated lines will lose cool air, so you’re wasting money. Don’t run the lineset near electrical wires unless you have to, and if you do, keep them separated to avoid interference. Do check for leaks after you open the valves—you can use a soapy water solution, spray it on the fittings, if you see bubbles, you’ve got a leak, tighten the fitting a little more. Don’t skip the level checks at every step—every time you move a unit, double-check it. Oh, and if you’re drilling into a wall with pipes or wires inside? Just call a friend who knows how to find them, or a handyman. Hitting a water line is no fun.
Now, quick note on if you should hire a pro vs DIY. If you’re comfortable with tools, and you’re not afraid of following instructions, DIY is totally possible. But if you’re nervous about wiring or refrigerant, hiring a licensed HVAC tech is worth the extra money. A pro will get it done fast, make sure there are no leaks, and it’ll be under warranty if something goes wrong. Either way, we can help—whether you need to pick up supplies from our warehouse, or we can connect you with a trusted tech in your area.
At the end of the day, mini splits are one of the best investments you can make for your home—they’re energy efficient, cool specific rooms (so you don’t have to cool the whole house), and they last forever if installed right. We’ve been in the AC game for years, and we stand behind every unit we sell. If you’re ready to get started, or you have questions about what size unit you need, or you need help ordering parts, we’re here. Just reach out to our team to talk through your needs, no pressure, no salesy stuff—just real advice.
Oh, and one last thing: don’t forget to turn on your warranty when you get your unit. We’ll send you the link, or you can fill it out on our site, it’s quick, and it covers you for 5 years on parts, 1 year on labor. That’s our way of making sure you’re covered if anything goes wrong.
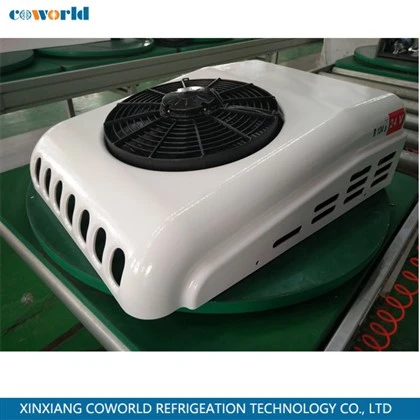
Thanks for reading, and if you have any questions, hit us up anytime. We’re not just a supplier—we’re here to help you keep your space cool, no matter what.
Refrigeration Unit References:
- Mini Split Installation Guide, Department of Energy, 2022
- Residential HVAC Installation Best Practices, Air Conditioning Contractors of America, 2021
- DIY Mini Split Install Tips for Homeowners, Home Improvement Association, 2023
- Safety Standards for Mini Split Electrical Wiring, Occupational Safety and Health Administration, 2022
Xinxiang Coworld Refrigeration Technology Co., Ltd.
As one of the most professional air conditioner manufacturers and suppliers in China, our products have good reputation in the market. We warmly welcome you to buy cheap air conditioner for sale here from our factory. If you have any enquiry about cooperation, please feel free to email us.
Address: B103 ROOM, GT CITY, NO.199 ZHENGZHONG ROAD, HIGH TECH ZONE, XINXIANG CITY, HENAN PROVINCE, CHINA
E-mail: coworldfrio@hotmail.com
WebSite: https://www.coworldthermo.com/
