Alright, let’s cut to the chase—if you’re here because you’ve got a ball valve that needs soldering, you’re probably not a brand-new DIYer (or if you are, don’t panic, I’ll keep it simple). I’ve been in the ball valve game for over 8 years—my team’s shipped thousands of these bad boys to plumbers, contractors, and even random home renovators who thought they could tackle a bathroom remodel themselves. Soldering a ball valve isn’t rocket science, but skip a step and you’ll end up with leaks, wasted time, and maybe even a frustrated homeowner. Let’s walk through this like we’re chatting over a coffee, not a textbook. Ball Valve
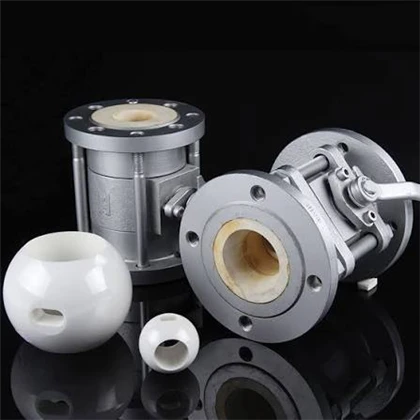
First, let’s talk about the valve itself—this is non-negotiable. You can’t just grab any old ball valve off the shelf and solder it, trust me. I’ve seen guys grab a cheap, brass ball valve meant for thread-only connections and torch it, only for the stem to warp or the seals to blow out within a month. The right one needs to be “solder-equal” or “threaded-solder” compatible. Wait, what’s the difference? Threaded ends have male threads on one side, solder sockets on the other—super common for replacing old pipe. Solder socket ends on both sides are for when you’re connecting straight into copper pipe runs, no threads at all. Pro tip from my warehouse: always double-check the valve’s pressure rating. If you’re doing a main water line, go for a 150-psi or higher WOG (water, oil, gas) rating—no skimping here. Cheaper valves might look the same but can’t handle the pressure, and you’ll be back at 2 a.m. fixing a leak.
Next up: the prep work. This is 70% of the battle. If you skip prepping the pipes, even a great soldering job will leak. Let’s start with cutting the copper pipe. Use a pipe cutter, not a hacksaw—hacksaws leave jagged edges that get in the way of a tight solder joint. When you cut, spin the cutter around the pipe a few times, tightening the screw a quarter turn each time until it bites through. Once cut, use the reamer (or a small flathead screwdriver) to deburr the inside and outside of the pipe end. Those tiny metal shavings? They’ll clog the valve, ruin the flow, or cause leaks—so get ’em all out. Wipe the pipe with a clean rag to remove any dust or gunk, too.
Now, the valve ends. Take a piece of emery cloth (the fine-grit kind, not the rough stuff) and scrub the inside of the solder socket on the valve and the outside of the copper pipe end. Do this until both are shiny and bright—oxidation is solder’s enemy, right? If the metal’s dull, the solder won’t stick. One quick trick: don’t touch the shiny parts with your bare hands. The oil from your skin will prevent the solder from bonding. Hold the pipe or valve by the non-prepped end while you work.
Last prep step: flushing the valve. Turn the ball valve’s handle to the open position—super important, I can’t stress this enough. If it’s closed when you solder, the heat will get trapped inside the valve, melt the seals, and you’ll have a useless valve before you even turn the water on. I learned this the hard way years ago when a new hire soldered a closed valve on a job—we had to yank it out and replace it, costing the customer a whole extra day. Don’t be that guy.
Now, the soldering supplies. Let’s make sure you’ve got everything before you light the torch. You’ll need a propane or MAPP gas torch—MAPP burns hotter, so it’s better for thicker pipes or cold rooms, but propane works fine for most residential jobs. Solder: lead-free, always. Most places require it for potable water lines, and even if you’re working on gas, lead-free is safer. The right size is 1/8-inch diameter for most 1/2-inch or 3/4-inch pipes, which are the most common for ball valves. Flux is non-negotiable, too. Flux cleans the metal while you heat it, so the solder can flow. Paste flux is easier to control than liquid, in my opinion—just a thin layer on the pipe end and inside the valve socket. Don’t slather it on like you’re icing a cake, a thin coat is all you need.
Also, grab a fire extinguisher or a bucket of water, just in case. Torch + wood framing + dry wall = bad news. And maybe a pair of heat-resistant gloves—your forearms will thank you.
Time to heat things up. First, assemble your pipe and valve dry (without solder) to make sure the fit is tight. If it wiggles, you might have cut the pipe wrong, or the valve’s socket is too big—fix that before you heat anything. Now, put a tiny bead of solder on the end of the copper pipe, right after you add the flux. That’s a test to make sure the flux is working, and also gets a little solder on the pipe early.
Light the torch. Hold it at a 45-degree angle, pointing away from your face and any nearby walls. Aim the flame at the junction where the pipe meets the valve, not just the valve or just the pipe. You want both metal parts to get hot evenly. Move the torch back and forth so you don’t overheat one spot. How do you know when it’s hot enough? Touch the end of the solder to the joint. If it melts and flows like butter all around the gap between pipe and valve, you’re good. If it beads up and doesn’t flow, keep heating—you didn’t get the metal hot enough.
Here’s another pro move: when you heat, rotate the pipe a little inside the valve socket so the heat spreads evenly. This ensures the solder will flow all the way around, not just on one side. Once it’s hot enough, touch the solder to the gap, not directly to the flame. The heat of the joint should melt the solder, not the torch. Keep feeding a little solder around the entire circumference until the gap is fully filled—don’t overdo it, though, extra solder will just drip down or block the pipe.
Now, turn off the torch. This is critical: don’t move the valve or pipe for at least 30 seconds. If you wiggle it, the solder will crack, and you’ll have a leak later. Let it cool slowly. While it’s cooling, wipe away any extra flux with a damp rag—flux is corrosive, so if you leave it on, it can eat away at the metal over time.
Once it’s totally cool (like, 5 minutes at minimum), it’s time to test. Turn on the water slowly—no full blast right away. Check for leaks around the solder joint and the valve stem. If you see a tiny leak, that’s a quick fix: turn the water off, let everything cool, heat the joint a little more, and add a touch more solder. If it’s a big leak? You probably didn’t heat the metal enough, or you had oxidation on the pipe, so you’ll need to cut that joint out and start over. I see this all the time with DIYers who rush the heating step—don’t rush.
Wait, what if you’re soldering a ball valve to a gas line? The process is almost the same, but there’s one extra thing: use yellow gas-line solder, not lead-free, and make sure the flux is rated for gas lines. Also, after testing, you’ll want to do a pressure test with air or nitrogen to make sure there are no leaks, since gas leaks are dangerous.
Now, let’s talk about common mistakes I see all the time, so you can avoid them. First, closed valve while soldering—we covered that, but it’s worth repeating. Second, not deburring the pipe—jagged edges catch solder, create gaps. Third, touching the prepped metal with your hands—oil kills the bond. Fourth, heating only one part (just the valve, not the pipe)—they need to be the same temp for solder to flow. Fifth, using too much or too little flux—too much leaves corrosive residue, too little means oxidation.
At the end of the day, soldering a ball valve is a skill that gets easier with practice. Even I messed up a few times when I was new to the job—once soldered a valve on a bathroom sink line and flooded a half-finished remodel. Oops. But once you nail the prep and take your time, it’s straightforward.

If you’re working on a big project, or just want to make sure you’ve got the right ball valve for the job, my team’s here to help. We stock all kinds of solder-compatible ball valves, from residential main lines to commercial grade, and we can answer any questions about fitting, pressure ratings, or anything else. Whether you’re a plumber needing a bulk order or a homeowner tackling a DIY project, we’ve got you covered. Hit us up to chat about your needs, and we’ll make sure you get the right valve and tips to get the job done right.
Top Entry Ball Valve References:
- Copper Development Association. Soldering Copper Pipe and Fittings.
- International Association of Plumbing and Mechanical Officials (IAPMO). Uniform Plumbing Code, Section 608: Soldered Joints.
- American Society of Mechanical Engineers (ASME). B16.10: Ferrous Pipe Flanges and Flanged Fittings.
- Ball Valve Manufacturers Association. Best Practices for Soldering Ball Valves for Potable Water Applications.
Yajin Valve Group
We are one of the most professional ball valve manufacturers and suppliers in China. With a professional production team, we offer a wide range of valves with superior quality. Please rest assured to wholesale customized ball valve made in China here from our factory.
Address: No.452,Wuxing Road Oubei, Yongjia, Wenzhou, Zhejiang Province
E-mail: yajin110602@gmail.com
WebSite: https://www.yajinvalve.com/
